Why Proper Nail Trimming is Important
Properly trimming a dog’s nails is a vital aspect of pet care that supports overall health and physical comfort. When nails are left untrimmed or cut improperly, they can cause discomfort, pain, and even lead to infections. Overgrown nails may result in an uneven gait, making it difficult for a dog to walk or run comfortably on hard surfaces.
Dogs experiencing nail-related discomfort often show signs such as limping, reluctance to move, or vocalizing pain while walking. With correct trimming—ensuring the nails are cut to a safe length and avoiding the quick—these symptoms typically disappear, allowing the dog to become more mobile and energetic. This small but significant grooming step greatly contributes to a pet’s well-being.
In addition to physical benefits, regular nail care enables early detection of potential issues such as redness, injuries, or signs of infection. Prompt identification of these concerns allows for immediate attention and prevents complications from developing.
Preparing the Equipment and Grooming Area
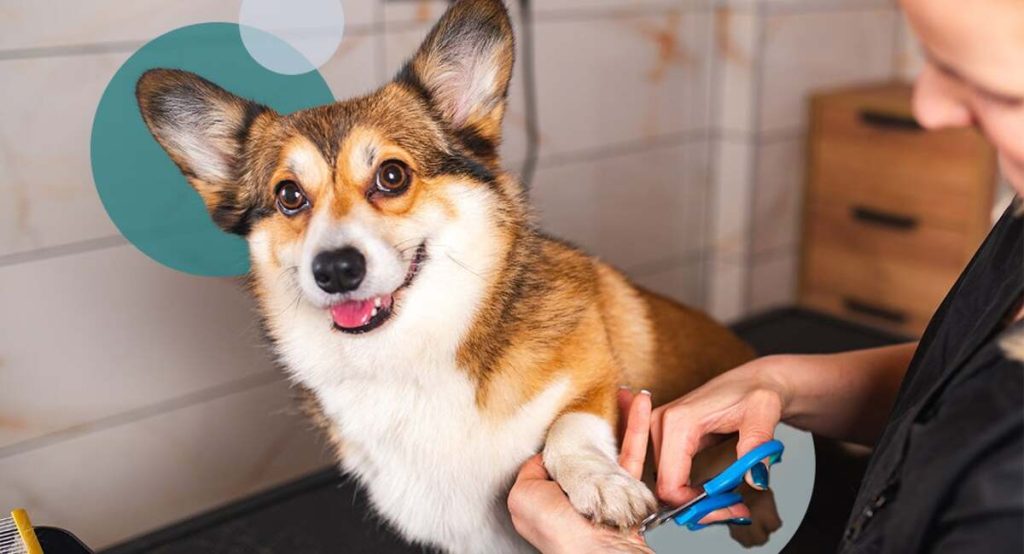
Choose a quiet and well-lit area for the trimming session. Place a non-slip mat on the floor or table to prevent the dog from slipping during the process. Prepare the appropriate nail clipper for the size of your dog’s nails, styptic powder for emergencies, and treats for positive reinforcement.
Make sure the nail clipper is clean and sharp before use. A dull clipper can cause nail splitting and painful cutting. Test the clipper on one of your own nails to see how it feels.
Before starting, allow your dog to see and sniff the tools. Use a calm voice and offer praise as you introduce the clipper. This helps keep your dog relaxed throughout the process.
Understanding Dog Nail Anatomy
It’s crucial to recognize the quick, the part of the nail containing blood vessels and nerves. In translucent nails, this appears as the pink section inside. If your dog has dark nails, look for the curve where the black part ends and the slightly clearer section begins.
When trimming your dog’s nail, it’s important to steer clear of the quick, as cutting into this sensitive area can cause pain and bleeding. If you’re unsure where it is, trim only a small portion at a time and check for a small white dot at the tip of the nail—this indicates you’re close to the quick.
Understanding nail anatomy gives you confidence in trimming and reduces the risk of accidentally cutting into the sensitive area, making the process safer and more comfortable for your dog.
Knowing When to Trim
It’s best to check your dog’s nail length monthly or whenever you hear their nails clicking against the floor. This sound is a clear sign that trimming is needed. If your dog frequently walks on soft surfaces, you may not notice nail growth as quickly.
Since the quick grows longer as nails grow, it’s better to start trimming early rather than waiting until the nails are too long. For older dogs, more frequent trimming may be needed since the quick doesn’t recede as fast as the nails grow.
Choose a time when your dog is calm, such as after a walk or light playtime. This is when they are more relaxed and cooperative during the trimming session.
Stopping Bleeding if the Quick is Cut
If you accidentally cut the quick, immediately apply styptic powder or a styptic stick to the bleeding nail. Gently press on it for a few seconds until the bleeding stops. Even if you make a mistake, don’t forget to praise your dog to prevent fear of future nail trims.
If you don’t have styptic powder, you can use cornstarch or baking soda as a temporary stopgap. Gently press the powder onto the nail and monitor if bleeding continues. If it doesn’t stop within five minutes, consult a veterinarian.
After the incident, allow your dog to rest and offer a treat. Creating a positive experience after an accident prevents them from associating nail trimming with pain or fear.
Different Nail Trimming Methods
There are two common trimming methods: using a nail clipper or a nail grinder. Clippers are quick and easy for most dogs, while grinders provide a smoother finish and reduce the risk of cutting the quick, especially for dark nails.
If using a grinder, start at a low speed and slowly bring it closer to the nail. Allow the dog to get used to the sound and vibration before using it. With clippers, ensure you hold them straight and cut quickly to avoid crushing the nail.
Try both methods to see which one is more comfortable for you and your dog. The right tool makes the process easier and reduces stress for both of you.
Keeping Your Dog Calm During Nail Trimming
Start with short sessions, trimming just a few nails at a time. Use a gentle voice and give praise after each successful cut. Small treats can help create a positive experience.
If your dog becomes anxious, take a break and allow them to relax. Play for a few minutes before trying again. Forcing the process may only cause more fear in future sessions.
Be consistent with your approach and schedule. As your dog becomes familiar with the trimming routine, the process will become smoother, and each session will take less time.
Post-Trimming Care
After trimming, check the nails for any redness or signs of infection. If you see a wound, clean it gently with a pet-safe antiseptic solution. Allow it to dry completely before letting your dog walk around.
Reward your dog with a treat and praise after the session. This reinforces positive feelings and helps them associate the process with rewards. To enhance bonding, you can also give a short paw massage using a dog-safe moisturizer.
Keep grooming tools clean. Sanitize the clipper or grinder after each use to prevent bacteria from spreading during the next session.
Avoiding Common Mistakes
One common mistake is cutting too much of the nail, especially with dark nails where the quick is not visible. Avoid trimming too much in one session—start with a small amount and trim more next time if necessary.
Using sharp clippers ensures a clean cut. A dull clipper can cause nail splitting and discomfort. Replace the blade when you notice it is no longer sharp enough.
Don’t wait too long between trims. Overgrown nails cause discomfort, but trimming too frequently can weaken the quick. Finding a balanced routine is key.
Long-Term Nail Care for a Healthy Dog
Regular trimming every four to six weeks promotes good posture and comfortable walking for your dog. As your dog grows, the nail growth rate may change, so it’s important to observe and adjust as needed.
A proper routine includes brushing the paws, checking the skin, and trimming the nails together. When these steps become part of normal pet care, the process will be easier and faster with each session.
Having a safe and well-established trimming habit results in a healthier and happier dog. Maintain a positive approach and remember that each session is an opportunity to strengthen your bond with your pet.